Photoshop is one of the most powerful and widely-used graphic design and photo-editing software programs in the world. Developed by Adobe Systems, Photoshop has become the industry standard for digital image manipulation, with applications ranging from photography, graphic design, web design, to digital art creation. Whether you’re a professional photographer, a designer, or just someone who enjoys editing photos for personal use, Photoshop offers a wide array of tools that allow users to create, enhance, and transform images.
At its core, Photoshop is designed to help users manipulate images at both pixel and vector levels. It allows for precise editing, enabling users to adjust colors, remove blemishes, add special effects, and even create entirely new images from scratch. The software is renowned for its ability to work with layers, a feature that allows different elements of an image to be edited independently, making complex edits easier and more efficient.
Key Features of Photoshop
One of the standout features of Photoshopis its flexibility. Users can access an extensive library of tools and options that enable everything from basic photo retouching to advanced image compositing. Key features include:
Layer Management: Layers are central to Photoshop, allowing users to stack and manipulate multiple elements in an image independently.
Advanced Selection Tools: Photoshop offers various selection tools, such as the Magic Wand and Quick Selection tools, to isolate parts of an image for editing.
Retouching Tools: Photoshop comes with an array of tools like the Clone Stamp, Healing Brush, and Spot Healing Brush, designed to fix imperfections and restore old or damaged photos.
Filters and Effects: With built-in filters, Photoshop allows users to add artistic effects, textures, and other enhancements with just a few clicks.
Text and Typography Tools: Photoshop provides powerful text manipulation features, making it easy to add and customize text within images.
3D and Motion Graphics: Photoshop can also be used to create basic 3D models and motion graphics, adding to its versatility as a digital creation tool.
Photoshop is used by a wide variety of professionals and creatives. Photographers, graphic designers, illustrators, and digital artists all rely on Photoshop to bring their ideas to life. It’s also popular among web designers who use it to create website mockups and user interface designs. Beyond professionals, Photoshop is widely used by hobbyists and enthusiasts who enjoy editing personal photos, creating digital art, or experimenting with creative techniques.
In summary, Photoshop is a powerful tool for anyone interested in working with digital images. With its robust feature set and user-friendly interface, it enables users of all skill levels to create stunning images, regardless of their specific needs. Whether for personal projects or professional work, Photoshop continues to be a top choice for digital image manipulation and design.
Photoshop Graphics Design is a photo editing and raster graphic design which allows users to create, edit, and manipulate various graphics as well as digital art. It also allows to create and edit raster images with multiple layers and import the images in various file format. Photoshop Graphics Design is developed by Adobe Systems for both Windows and MacOS.
This is a Photoshop Graphics Design basics’ for designers in the latest version of Photoshop Graphics Design Creating Excellent job work with Filter Effect on Adobe Photoshop CC with Guru99. We are going to cover introduction to Photoshop and a lot of features which are commonly used by each and every designers to create some composites or any design or to make any illustrations or even just doing some simple retouching on Photoshop Graphics Design latest version.
So we are going to cover some most common features like workspace, layers, smart objects, blend modes, selections techniques, filters and much more Photoshop basics and necessary features that every designers use to work on Photoshop Graphics Design Creating Excellent job work with Filter Effect on Adobe Photoshop.
Move and Selection tools

Move Tool*(V)The Move Tool is used to move layers, selections and guides within a Photoshop document. Enable “ Auto-Select” to automatically select the layer or group you click on.

Artboard Tool (V)The Artboard Tool allows you to easily design multiple Web or UX (user experience) layouts for different devices or screen sizes.

Rectangular Marquee Tool * (M)The rectangular Marquee Tool draws rectangular selection outlines. Press and hold shift as you drag to draw a square selection.
Elliptical Marquee Tool (M)
The Elliptical Marquee Tool draws elliptical selection outlines . Press and hold Shift to draw a selection in a perfect circle.
Single Row Marquee Tool
The Single Row Marquee Tool in Photoshop selects a single row of pixels i the image from left to right.
Lasso Tool * (L)
With the Lasso Tool, you can draw a freeform selection outline around as object.
Polygonal Lasso Tool (L)
Click around an object with the Polygonal Lasso Tool to surround it with a polygonal, straight-edged selection outline.
Magnetic Lasso Tool (L)
The Magnetic Lasso Tool snaps the selection outline to the edges of the object as you move your mouse cursor around it.
Object Selection Tool * (W)
The Object Selection Tool lets you select an object just by dragging a rough selection outline around it.
Quick Selection Tool (W)
The Quick Selection Tool lets you easily select an object simply by painting over it with a brush. Enable “Auto-Enhance” in the Options Bar for better quality selections.
Magic Wand Tool (W)
Photoshop’s Magic Wand Tool selects areas of similar color with a single click. The “Tolerance” value in the Options Bar sets the range of colors that with be selected.
Crop and Slice tools
Crop Tool* (c)
Use the Crop Tool in Photoshop to crop an image and remove unwanted areas. Uncheck “delete Cropped Pixels” in the Options Bar to crop an image non- destructively.
Perspective Crop Tool (c)
Use the Perspective Crop Tool to both crop an image and fix common distortion or perspective problems.
Slice Tool (C)
The Slice Tool divides an image or layout into smaller sections (slices) which can be exported and optimized separately.
Slice Select Tool (c)
Use the Slice Select Tool to select individual slices created with the Slice Tool.
Frame Tool* (k)
New as of Photoshop CC 2019, the Frame Tool lets you place image into rectangular or elliptical shapes.
Measurement tools
Eyedropper Tool *(l)
Photoshop’s Eyedropper Tool samples colors in an image. Increase “Sample Size” in the Options Bar for a better representation of the sampled area’s color.
3D Material Eyedropper Tool (l)
Use the 3D Material Eyedropper Tool to sample material from a 3D model in Photoshop.
Color Samples Tool (l)
The Color Sampler Tool displays Color values of the selected (sampled) area in an image. Up to four areas can be sampled at a time. View the color information in Photoshop’s Info Panel.
Ruler Tool (l)
The Ruler Tool measures a stances, locations and angles. Great for positioning image and elements exactly where you want them
Note Tool (l)
The Note Tool allows you to attach text- based notes to your Photoshop document, either for yourself or for others working on the same project. Notes are saved as part of the. PSD file.
Count Tool (l)
Use the Count Tool manually count the number of objects in an image , or to have Photoshop automatically count multiple selected areas in the image.
Layers in Photoshop
Layers are one of the finest tools of Photoshop. They are like a separate sheet of paper arranged in a sequence to create an exceptional image. We can see through transparent areas of the layers to layer down. We can also move layers to set the image content. We can move a layer up or down to position an element on the image. Moving a layer is a straightforward process, just like sliding a sheet of acetate in a stack. We can also specify the opacity of the layer to make the layer’s content partially transparent or completely transparent.

Using Layers, we can perform tasks like the composition of multiple images, adding text to an image, adding shapes, and more. We can also apply a layer style to provide a special effect such as glow or drop shadow to a layer. We can add or delete a layer at any moment while working. It is quite easy to manage Layers and work with them.
The layer is an essential feature of Photoshop; we cannot assume to create something creative without using Layers. By default, the Essentials workspace of Photoshop contains a layers panel, where all the layers can be seen and managed. If it is not available, then it can be displayed by navigating the Window-> Layers menu or by hitting the f7 key.
RAINBOW :

Open Any Picture –› Insert A New Layer –› Click On Gradient Tool And Click On Gradient Editor –› Choose “Transparent Rainbow “ Gradient Color Form The List –› Now Drag The Color Tabs To The Right And Place Each Tab One After Another And Also The Opacity Tabs –› Ok –› Set : Radial Gradient , Mode : Linear Light , Opacity : 30 (Property Bar) –› Now Drag The Move Form The Bottom Left Corner To Middle Of Picture –› Choose History Brush Tool And Erase The Unwanted Portions Of The Rainbow Color By Using Appropriate Brush Size . ( Normal To Screen )
RAIN FALL :

Open Any Picture –› Insert a New Layer(Shift+Ctrl+Alt+N) –› Press “ D “ Foreground Color: Black & Background Color: White –› Filter –› Noise –› Add Noise –› Set : Amount:60, Click on Checkbox of Gaussian, Monochromatic option–› Ok –› Filter –› Blur –› Motion Blur –› Set: Angle : 75 Degree, Distance: 10 –› Ok –› From Layer Box Change Normal To Screen And Change Opacity : 60%.
CIRCULAR RIPPLE ( WATER ) :
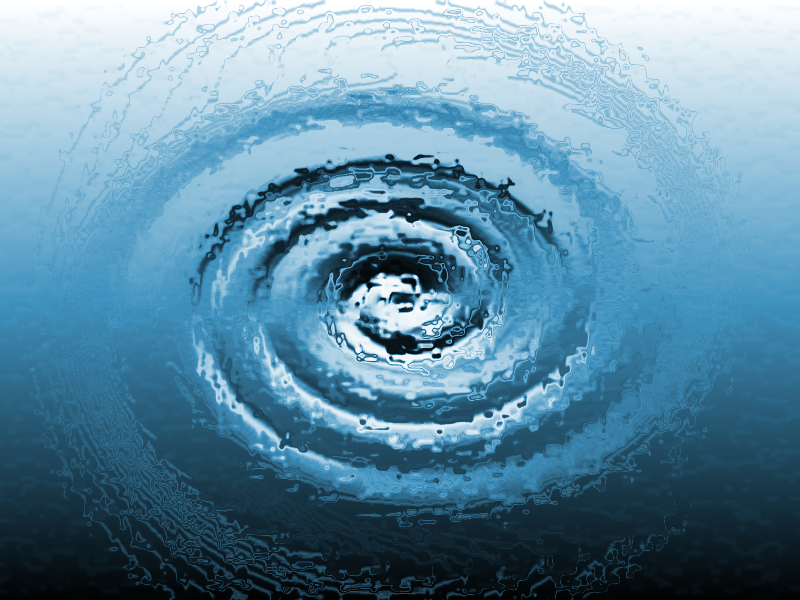
File –› New –› Set :Width : 800, Height: 800, Resolution : 72, Color Mode : RGB , Background Contents : White –› Ok –› Presss “D” And Then “X” –› Press CTRL + Backspace –› Filter –› Render –› Lens Flare –› Set : Place The Lens In The Middle , Brightness : 100, Lens Type :35mm Prime –› Ok –› Filter –› Distort –› Twirl –› Set : Angle:999 –› Ok –› Filter –› Sketch –› Bas Relief –› Set –› : Detail: 13, Smoothness:3, Light : Bottom –› Ok –› Filter –› Distort –› Ocean Ripple –› Set : Ripple Size: 15 , Ripple Magnitude : 9 –› Ok –› Image–› Adjustment –› Hue/Saturation –› Set : Click On Colorize , Hue : 200, Saturation : 50 –› Ok .
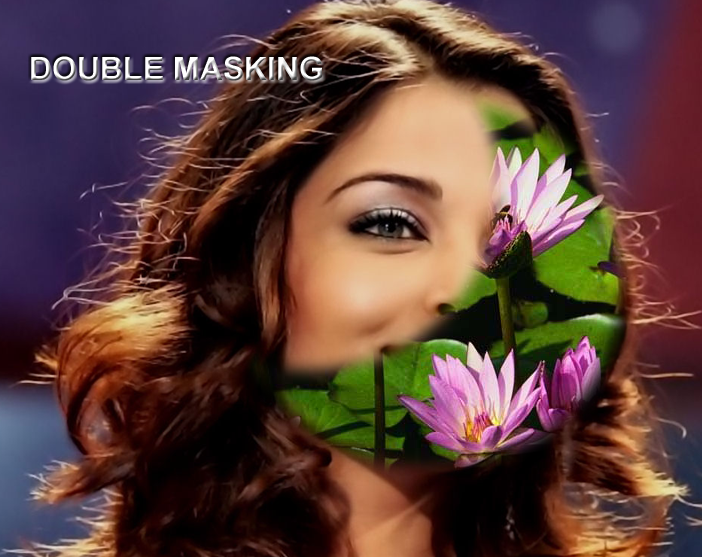
DOUBLE MASKING:
CTRL+O –› Select Two Picture (Flower And Model) –› Open –› Select Flower Picture –› CTRL+A –› CTRL+C –› CTRL+N –› Ok –› CTRL+V –› Close Original Flower Picture –› Click On Model Picture –› Drag And Drop On The Flower –› Close Original Model Picture –› CTRL+T –› Increase And Decrease Size –› Enter –› Select Elliptical Marquee Tool –› Set : Feather:7px –› Draw A Circle On The Face –› Click On Add Layer Mask.
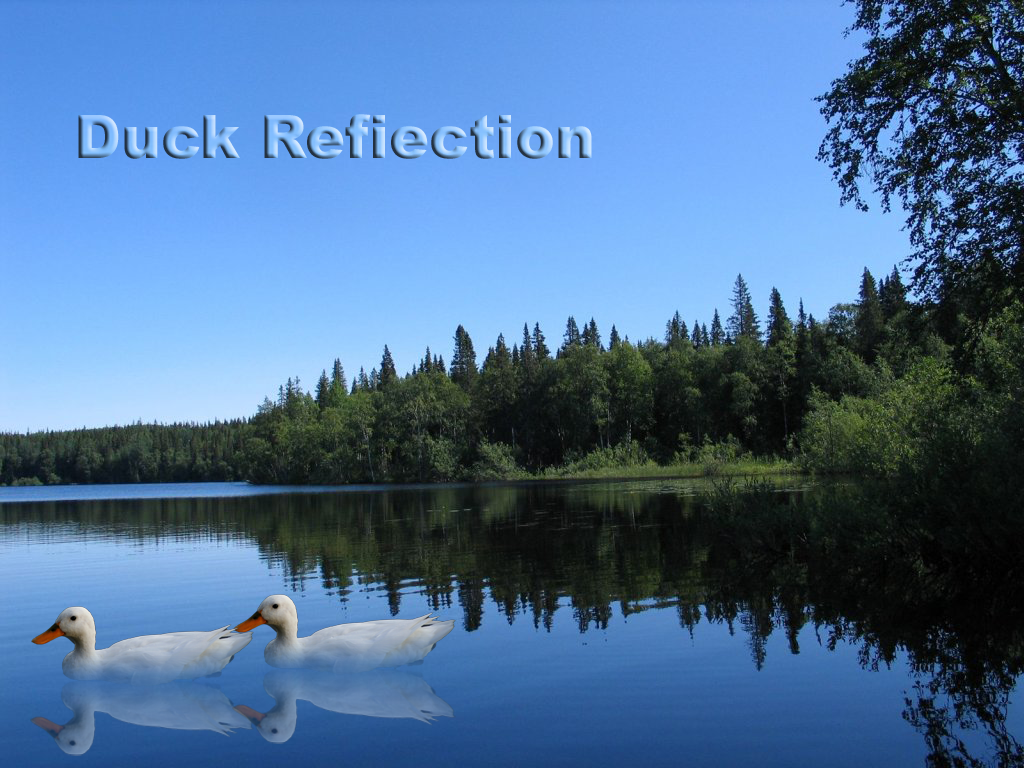
REFLECTION:
CTRL+O –› Select Any Water And Duck Picture –› Open –› Duplicate Water Picture –› Close Original Picture –› Select Duck By Lasso Tool –› CTRL+ALT D –› Radius: 2 Pixels –› Ok –› CTRL+C –› Click On The Water Picture –› CTRL+V –› CTRL+T –› Increase And Decrease Duck Size –› Enter –› Select Layer 1 –› Select Rectangular Marquee Tool –› Set : 24 Px –› Enter –› Draw A Rectangle Below Portion Of Duck –› Press Delete (Few Times) –› For Fade On Grass –› CTRL+D –› CTRL+J (Duplicate Layer) –› Select Layer 1 Copy –› Edit –› Transform –› Flip Vertical –› Press Down Arrow For Shadow –› Change Opacity:30-40% –› CTRL + E –› Press ALT And Duplicate Duck –› Click On Background Water Layer –› Select Horizontal Type Mask Tool –› Click On The Page –› Type Duck Reflection –› Click On Move Tool –› CTRL + C –› CTRL + V –› Select Layer 2 –› Add A Layer Style (Fx) –› Bevel And Emboss –› Ok.
WATER DROPS :
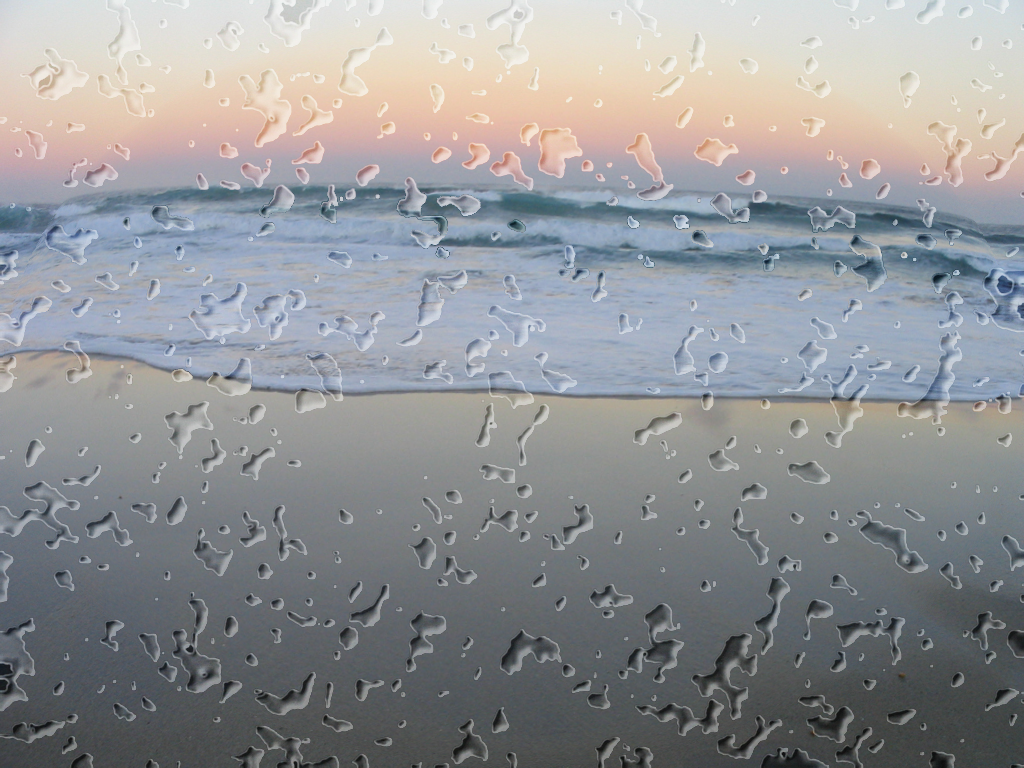
Open Any Picture –› Insert A New Layer –› Press “D” –› Filter –› Render –› Clouds –› Filter –› Stylize –› Find Edges –› Image –› Adjustment –› Levels –› Set : Input Levels : 220, 1.00, 255 –› Ok –› Filter –› Sketch –› Plaster –› Set : Image Balance:40, Smoothness: 14, Light: Top Left –› Ok –› Filter –› Sharpen –› Unsharp Mask –› Set : Amount: 500, Radius: 1.0. Threshold:0 –› Ok –› Choose Magic Wand Tool And Set Tolerance: 10 (Property Bar) –› Click On The Black Background And Press Delete –› Select –› Inverse –› From Layer Box Change Normal To Soft Light –› Click On Background Layer –› Filter –› Distort –› Spherize –› Set :Amount: 35 –› Press Ctrl D.
EXPLOSION :

File –› New –› Set : Preset:800 X 600, Resolution: 72, Color Mode: Rgb, Background Contents: White –› Ok –› Press “D” –› Filter –› Noise –› Add Noise –› Set : Amount: 10, Distribution: Uniform, Monochromatic –› Ok –› Image –› Adjustment –› Threshold –› Set : Threshold Level: 240 –› Ok –› Filter –› Blur –› Motion Blur –› Set : Angle: 90, Distance: 400 –› Ok –› (Image Adjustment –› Invert) –› Insert A New Layer –› Choose Gradient Tool And Choose Black, White Gradient Color From The List –› Set : Liner Gradient, Mode : Normal, Opacity: 100 –› Drag The Mouse From The Middle Of The Bottom To The Top –› From Layer Box Change Normal To Screen –› Layer –› Flatten Image –› Filter, –› Distort –› Polar Coordinates –› Ok –› Press “X” –› Filter –› Blur –› Redial Blur –› Set : Amount: 100, Zoom, Good –› Ok –› (Image –› Adjustment –› Hue/Saturation) –› Set : Click On Colorize Hue: 35, Saturation:65 –› Ok –› Press Ctrl + J –› From Layer Box Change Normal To Color Dodge –› Filter –› Render –› Clouds –› Filter –› Render –› Difference Clouds (100 Times) Ctrl + F –› Filter –› Noise –› Add Noise –› Set : Amount: 5, Distribution: Gaussian, Monochromatic –› Ok.
MASKING (SINGLE PICTURE):

Open Any Picture –› Press CTRL+J –› Click On Background Layer –› Press SHIFT+CTRL+U –› Insert A New Layer –› Choose Elliptical Marquee And Draw A Circle –› Fill Any Color In The –› Press ALT And Click In Between The And Layer 2 –› Press CTRL +D –› Click On And Turn Off Auto Select Layer (Property Choose Move Tool And Move The Circle.
EXTRUDE TEXT:

File –› New –› Set: Preset: 800×600, Resolution: 72, Color Mode: RGB, Background Contents: Transparent –› Ok –› Choose Horizontal Type Tool And Type The Text “EXTRUDE” –› Click On Move Toll –› Windows –› Character –› Change: Font: Arial Black, Size:100, Bold, Color: Brown, Tracking: 100 –› Right Click On The Layer –› Rasterize Layer –› Press CTRL+J (Duplicate Layer) –› Hide The Top Layer –› Click On The Bottom Layer –› Filter –› Blur –› Motion Blur –› Set : Angle: 45, Distance: 80 –› Ok –› Press CTRL + J (10 Times) –› Press SHIFT + CTRL + E –› Again Press CTRL + J (20 Times) –› Again Press SHIFT + CTRL + E –› Click On The Top Layer –› Press CTRL And Click On The Top Layer –› Change The Foreground Color As Yellow And Fill The Color –› Press CTRL + D –› Choose Polygonal Lasso Tool And Select The Text Area Below The Yellow Text –› Click On Bottom Layer And Press Delete –› Press CTRL + D –› From Layer Box Click On Add A Layer Style And Choose Inner Shadow –› Set: Distance:20, Choke:15, Size:20 –› Ok –› From A New Layer And Fill Any Background Color –› Now Drag The Layer And Place The Layer Below All The Layers.

DIAMOND TEXT:
File –› New –› Set Preset:800x 600, Resolution:72, Color Mode: RGB, Background Contents: White –› Ok –› Press “D” –› Choose Horizontal Type Mask Tool & Type The Text “DIAMOND” –› Set : Font: Arial Black, Size:100 –› Insert A New Layer –› Fill The Text With Black Color –› Press CTRL + T & Increase The Text Size –› Enter –› Filter –› Render –› Clouds –› Filter –› Distort –› Glass –› Set: Distortion:20, Smoothness: 1, Texture: Tiny Lens, Scalling:55 –› Ok –› From Layer Box Click On Add A Layer Style & Choose Stroke –› Set: Size: 10, Position Center, Fill Type: Gradient : Copper –› Ok –› Again Choose Bevel And Emboss From Add A Layer Style –› Set : Style: Storke Emboss, Depth:880, Size: 10, Gloss Counter: Ring –› Ok –› Press CTRL + D –› Insert A New Layer –› Click On Background Layer And Fill Black Color –› Click On New Layer –› Press “X” –› Choose Brush Tool And Click On Brush List (Property Bar) And Click On The Arrow At The Top Of The Brush List And Choose “Assorted Brush And Set Brush Size: 80 And Click On The Text Borders.
ROPE :
File –› New –› Set: Preset: 800X600, Resolution: 72, Color Mode: RGB, Background Contents: Transparent –› Ok –› Fill The Page With Grey Color –› Filter –› Sketch –› Halftone Pattern –› Set: Size: 2, Contrast: 47, Pattern Type: Line –› Ok –› CTRL+T –› Set Rotation: 30 (Property Bar) –› Enter –› Enter –› Filter –› Noise –› Add Noise –› Set: Amount 50, Uniform, Monochromatic –› Ok –› Choose Rectangular Marquee Tool And Make A Long Rope Type Selection From Left Side To The Right Side –› CTRL+C –› CTRL+V (2 Times) –› Hide Layer 1 & 3 –› Click On Layer 2 –› Filter –› Distort –› Polar Coordinates –› Set: Rectangular To Polar –› Ok –› Image –› Adjustments –› Levels –› Set: Output Levels: 103 & 225 –› Ok –› From Layer Box Click On Add A Layer Style And Choose Drop Shadow –› Set: Size: 6 –› Again Choose Inner Shadow –› Set: Size: 6 –› Ok –› Choose Move Tool And Pres ALT And Duplicate The Shape 3 Times And Place It One Above Another –› Click On Layer 3 –› CTRL+T –› Set: Rotation: 90 –› Enter –› Enter –› Filter –› Distort –› Shear –› Curve The Line As () –› Ok –› Image –› Adjustment –› Levels –› Set: Output Levels 103 & 225 –› Ok –› From Layer Box Click On Add A Layer Side And Choose Inner Shadow –› Set: Size: 6 –› Ok –› Press CTRL+T And Scale & Rotate The Shape Seine As The Previous Shape & Place It Over The Top Shape –› Enter –› Press SHIFT+CTRL+E (Merge Layers) –› Image –› Adjustment –› Hue/Saturation –› Set: Click On Colorize –› Ok –› Insert A New Layer And Apply Any Background Color And Place The Layer Below All The Layers.
BLOOD EFFECT TEXT:
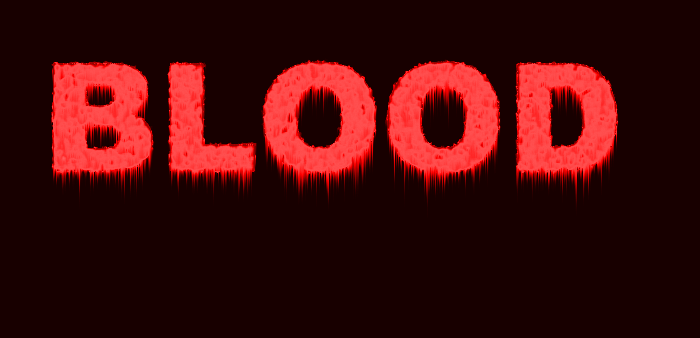
File –› New –› Set : Preset: 800X600, Resolution: 72, Color Mode: RGB, Background Contents: White –› Ok –› Image –› Mode –› Greyscale –› OK –› Choose Horizontal Type Tool and type the text “BLOOD” –› Set : Font: Arial Black, Size: 150, Color: Black –› Select –› Load Selection –› Set : Channel: BLOOD Tranaparency –› Ok –› Layer –› Flatten Image –› Select –› Inverse –› Filter –› Pixelate –› Crystallize –› Set : Cell Size: 4 –› Ok –› Select –› Inverse –› Filter –› Noise –› Add Noise –› Set : Amount: 70, Distribution: Gaussion, Click on Monochromatic –› Ok –› Filter –› Blur –› Gaussion Blur –› Set : Radius: 2.0 –› Ok –› Image –› Adjustment –› Curves (Make the line as ) –› Ok –› Press CTRL + D –› Press CTRL + I –› Image –› Rotate Canvas –› 90 CW –› Filter –› Stylize –› Wind –› Set : Method: Wind, Direction: From the Right –› Ok –› Image –› Rotate Canvas –› 90 CCW –› Image –› Mode –› RGB Color –› Change the Foreground color as Red –› Image –› Adjustment –› Hue/Saturation –› Set : Click on Colorize, Saturation: 100, Lightness: 5 –› Ok.
NATURAL LIGHT:
Open any picture–› Press CTRL + J–› Filter–› Blur–› Motion Blur–› Set: Angel:20, Distance:720–› OK–› Edit–› Transform–› Perspective–› Press SHIFT and Drag top right dost close to each other ()–› Enter–› Press CTRL+Tand rotate the shape as 20 and increase the size of the shape–› Enter–› press CTRL + I –› From layer box change “normal” to color Dodge and opacity:80 –› choose polygonal lasso tool and set Feather: 5Px and select the other side of the light –› choose Eraser Tool and choose any soft brush and erase the inside the selection –› Now repeat the same step with the other side of the light–› Image–› Adjustment–› Hue/saturation–› Set: Hue:- 28, saturation: – 28 –› Ok.
CADBURY:
File –› New –› Set: preset: 800×600, Resolution: 72,color mode: RGB, background Contents:White–› Ok–› Choose Rectangular Marquee Tool With Feather : opx and draw a Rectangular–› Insert a new layer–› fill a chocolate color in the shape–› press CTRL + d–› from layer box click on Add a layer style and choose bevel and emboss–› set: Depth: 880,size: 21,soften: 3 Gloss on contore: Rounded steps–› ok–› Choose: horizontal type tool and type the “Cadbury”–› set : Font: monotype corsiva press CTRL + T and rotate the text and place the text and place the text over the shape–› Enter–›
3D CUBE
Creating Excellent Job Work with Filter Effect on Adobe Photoshop To create a new document, go to File → New → Set the preset to 800X600, resolution to 72, color mode to RGB, and background contents to white. Click OK. Next, choose the Rectangular Marquee Tool and set the style to Fixed size. Specify the width as 300px and the height as 300px. Click on the page to create a shape. Insert a new layer and select the Gradient Tool. Choose a gradient color from the list and set the style to Linear Gradient, mode to Normal, and opacity to 100. Fill the gradient color by dragging from the top right corner to the left bottom corner. Press CTRL + D, then press CTRL + T. Go to Edit → Transform → Skew. Click on the right side middle square and move it upwards. Press Enter. Press CTRL + J, then press CTRL + T. Go to Edit → Transform → Flip Horizontal. Press SHIFT and drag the shape to place it on the left side. Click on the left side middle square and drag it closer to the right. Press Enter. Choose the Rectangular Marquee Tool and click on the page. Insert a new layer and fill the shape with the same gradient color. Press CTRL + D, then press CTRL + T. Go to Edit → Transform → Distort. Drag each corner and place it over the corresponding corner to get a perfect match. Press Enter. Press CTRL and click on the top layer. Go to Image → Adjustment → Levels. Set the input levels as 0, 0.55, 255. Click OK. Click on Layer 1 copy, then press CTRL and click on the layer. Go to Image → Adjustment → Levels. Set the input levels as 0, 0.55, 255. Click OK. Click on Layer 1, then press CTRL and click on the layer. Go to Image → Adjustment → Levels. Set the input levels as 0, 0.55, 255. Click OK. Finally, press CTRL + D.
CAST SHADOW
Creating Excellent Job Work with Filter Effect on Adobe Photoshop To create a new document:Open the picture of Ducky from the sample folder. Choose the Magic Wand Tool and click on the white background. Select and then inverse. Press CTRL + C. Go to File, then New. Set the Preset to 800X600, Resolution to 72, Color Mode to RGB, and Background Contents to White. Click Ok. Press CTRL + V. Press CTRL + J. Press D. Click on Layer 1 copy. Press CTRL and click on the layer. Fill the foreground color. Go to Filter, then Blur, then Gaussian Blur. Set the Radius to 3.5 and click Ok. Press CTRL + D. Press CTRL + T. Go to Edit, then Transform, then Distort. Click on the top middle square and drag it to the left side. Press Enter. Press CTRL + J. Click on Layer 1 copy. Go to Filter, then Blur, then Gaussian Blur. Set the Radius to 5.1 and click Ok. Click on Layer 1 copy 3. From the Layer box, click on Add Layer Mask. Choose the Gradient Tool and select Black, White Gradient color from the list. Set the mode to Liner Gradient, Opacity to 100. Drag the Gradient Tool from left to right over the shadow. Change the ‘Normal’ to ‘Multiply’ and set Opacity to 50. Click on Layer 1 copy and change Opacity to 30. Click on the Background layer and apply any color.
CAR
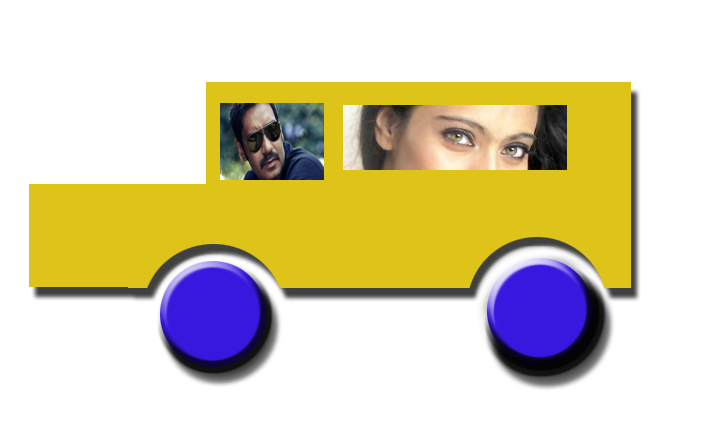
Ctrl+N -> size: 800 x 600 , resolution :72, color mode: RGB, back ground contend : white -> ok -> select rectangle marquee tool ->draw shape on the page -> click add tool selection -> draw shape -> click on subtract from selection-> draw shape -> select elliptical marquee tool ->click subtract from selection ->draw shape -> Insert+new layer/(Shift+ctrl+alt+n) ->pick up any foreground color (yellow) for apply car body color -> press alt+back space -> Ctrl+d(deselect) -> select layer -> press `w, (magic wand tool) click on (glass) position of car -> Ctrl+o-> open any image -> Ctrl+A -> Ctrl+C -> close image -> Shift+ctrl+V (past into) -> press ‘V’ move tool -> Ctrl+T (free transfrom) -> Increase/decrease size (Shift+Alt drag mouse) -> Enter -> insert new Layer (Layer 3) -> select Elliptical Marquee tool -> click on new selection -> Draw a shape -> press ‘D’ (For ground color: Black, Back ground color: white)->fill color (alt + backspace) -> ctrl+d (Deselect) -> Another create Duplicate layer (alt + J) Place on the shape (shift +ctrl +e) marge visible ->move the car one side to other side.
PASTE INTO JOB IN MAP
